Default & Enhanced Homepage
Default Homepage: Index - Parameters
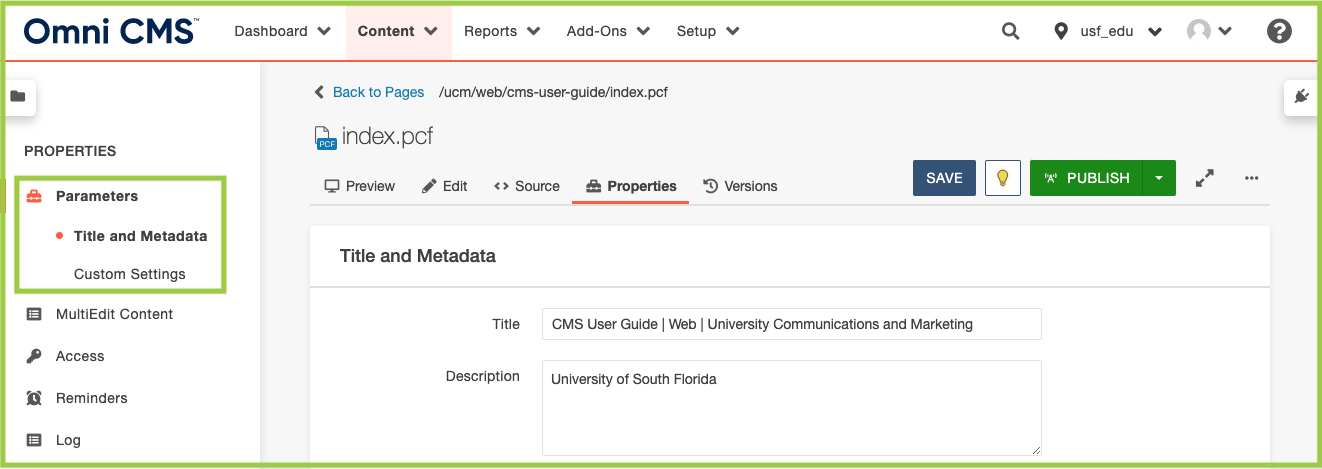
Parameters can be accessed once a file is checked out (lighbulb icon is illuminated) by clicking:
- "Edit", then "Parameters" on the left side navigation.
Tip: Think of the Parameters section as a setup area for content features. Once you have your page looking the way you like it, you then edit the content displayed in those areas by navigating to the MultiEdit or editing the widget(s) you selected to be displayed.
Title and Metadata
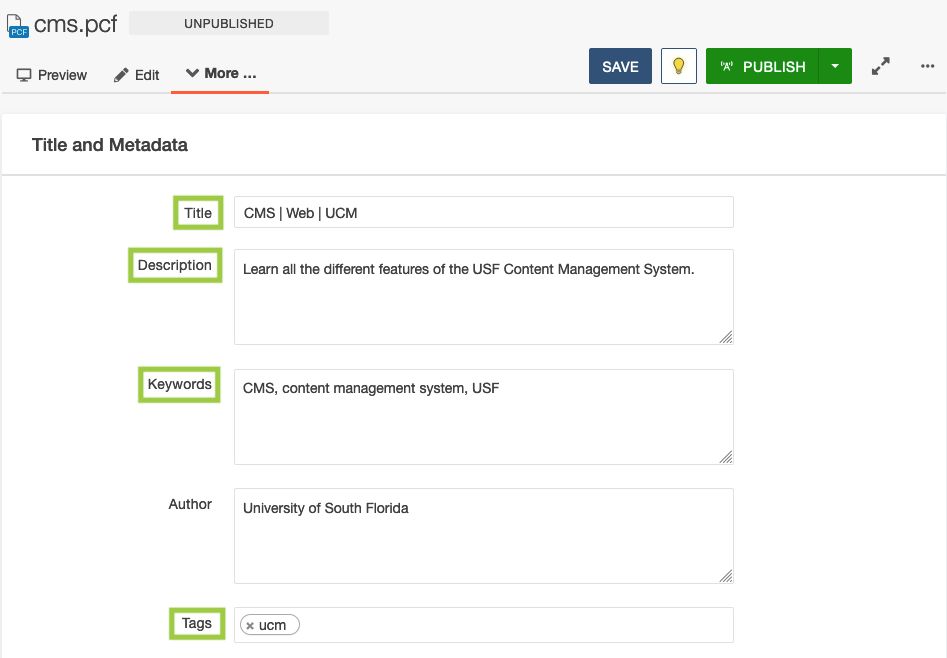
Metadata
For any page you create, you will need to update the Title and Description in the Properties section of each page.
Update Page Properties
- Check out the page you're working on by clicking the lightbulb icon.
- Click Properties.
- It will automatically take you to the Parameters tab.
- From there, update the Title based on the guidelines below.
- Update the Description by adding a short sentence about what the page is about.
- Include keywords and/or tags (if applicable).
- Click Save.
- Publish.
Learn more about creating great metadata.
Title
A page title, also known as a title tag, is the word or phrase that appears in the tab in an Internet browser, at the top of an Internet browser window, and on an Internet search result page. Creating the correct page title descriptions can help boost your site's web pages on Google's Search Engine Results Page (SERP) and make it easier for visitors to find your information. Learn more about creating great page titles.
Text Page Title Examples
- Content Title | Department/College Name
- Content Title | Section Title | Department/College Name
- Content Title | Department/College Name | USF/University of South Florida
- Do not have the same words or phrases appear multiple times.
- Example: College of Engineering | Engineering | Engineering
Custom Settings
Feature Area
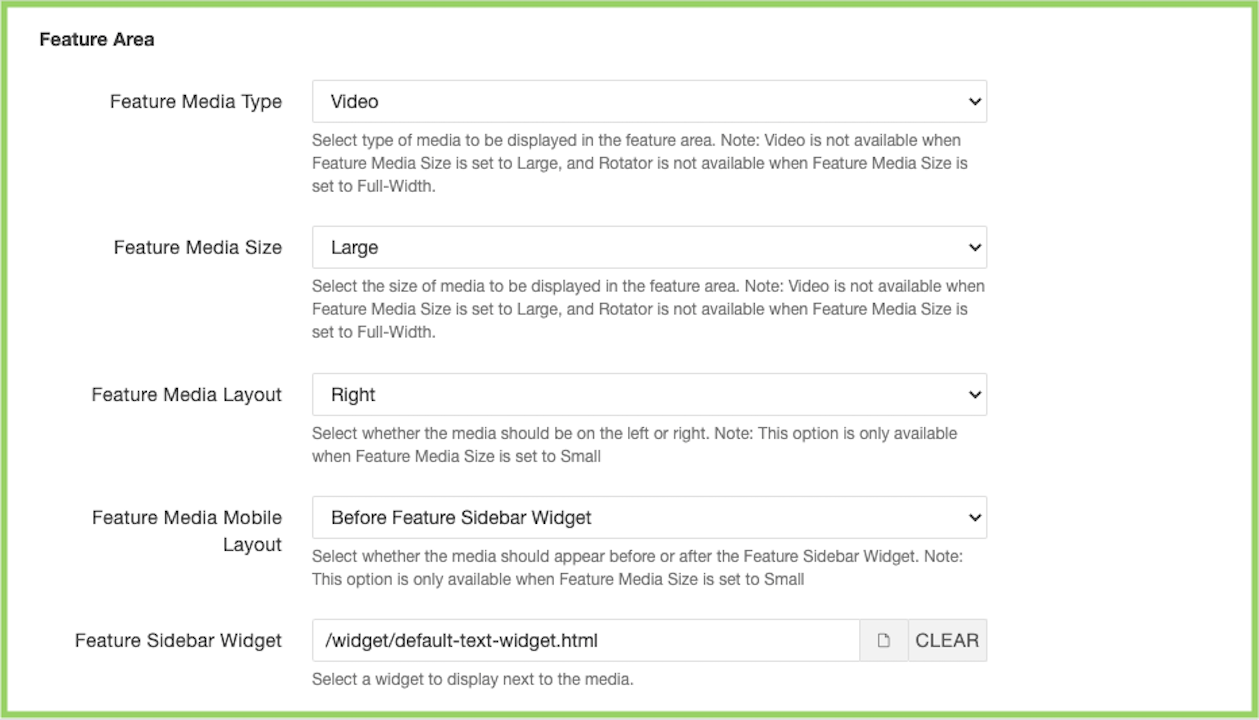
The Feature Area is the content displayed at the top of your homepage right below the main navigation. This area is highly customizable allowing the following options:
- Image
- Small image with one widget area to the right/left of image
- Large image
- Full-width image
- Video
- Small video with one widget area to the right/left of the video
- Full-width video
- Rotator
- 2-5 small or large images or graphics
Select Feature Media Type (Image, Video, or Rotator)
- Click Properties button in the page options at the top of the homepage.
- Select type of feature from the "Feature Media Type" drop down menu.
- Select size of feature from the "Feature Media Size" drop down menu. (error?)
- Images can be small, large, or full-width
- Videos can be small or full-width
- Rotator can be small or large
- Select layout of feature from the "Feature Media Layout" drop down menu (this option is only available when Feature Media Size is set to small) and will establish where the widget will be positioned.
- Select mobile layout of feature from the "Feature Media Mobile Layout" drop down menu (this option is only available when Feature Media Size is set to small).
- Navigate to and select the desired sidebar widget from the "Feature Media Sidebar Widget" text field (this option is only available when Feature Media Size is set to small).
For more information, check out the complete list of widgets.
Horizontal Call to Action

The purpose of the Horizontal Call to Action is to drive traffic to specific areas on your website. For example, at different points of the year, you may want to drive prospective students to apply, donors to give, or community members to attend a campus event.
Show/Hide Horizontal Call to Action
- Select Show or Hide from the "Show Horizontal Call to Action" dropdown.
- Click on the document icon (Dependency Manager) to find the Call to Action widget in your designated widgets folder.
Note: This area is used to determine whether you want to display the Horizonal Call to Action and link to the specific widget in your folder. See how to edit and/or create widgets.
Highlighted Content Section

The Highlighted Content Section is designed to draw attention to content that is special. The section includes an image, text, and hyperlink. This could be used to highlight a news story, event, or other piece of content such as an annual report.
Show/Hide Highlighted Content Section
- Select Yes or No from the "Highlighted Content Section Display" dropdown.
Note: This area is only to determine whether you would like the Highlighted Content Section to display on your page. To edit the actual content in the Highlighted Content Section, follow the instructions on Index - MultiEdit.
Widgets
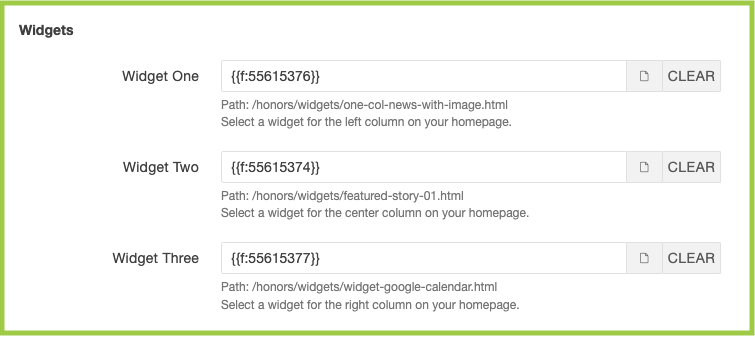
This area determines which widgets you would like to appear in the widget row above the footer of your homepage.
Note: This area allows you to select the widgets that will be displayed on the homepage. Widgets need to be created and published prior to following the instructions below. See how to edit and/or create widgets.
Link Widgets
- Click on the choose file in Widget One or enter the path manually to place a widget
in the left section of the widget row on your homepage.
- If choose file is selected locate the widget you in your designated widget folder.
- Click choose file.
- Click on the choose file in Widget two or enter the path manually to place a widget
in the middle section of the widget row on your homepage.
- If choose file is selected locate the widget you in your designated widget folder.
- Click choose file.
- Click on the choose file in Widget three or enter the path manually to place a widget
in the right section of the widget row on your homepage.
- If choose file is selected locate the widget you in your designated widget folder.
- Click choose file.
Social Media*
- Navigate to your homepage directory and select the "_props.pcf" file.
-
- Click "Properties".
- Under "Social Media", select "Show" or "Hide" in the "Show Social Media" section.
- Select/deselect the social networks you wish to appear on your homepage.
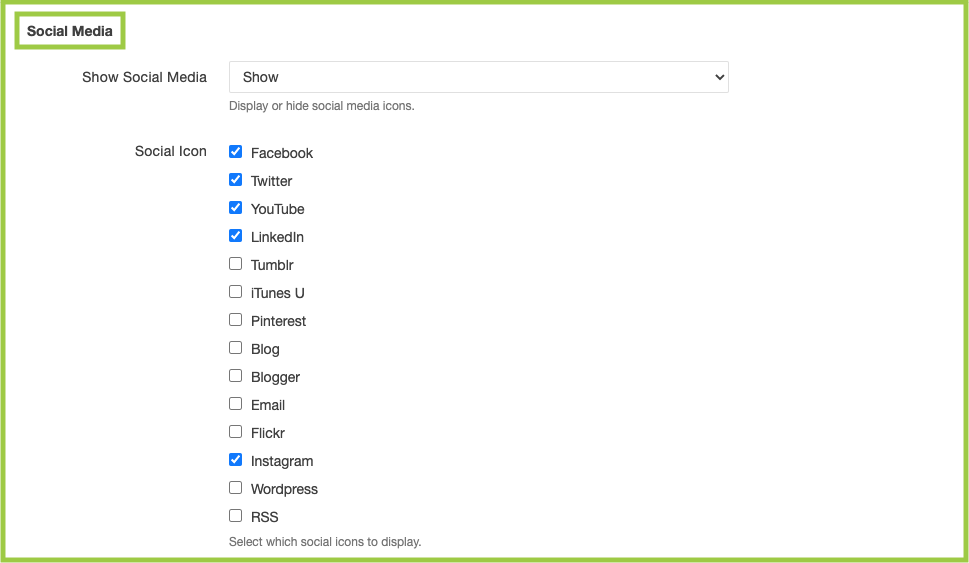
- Enter in the corresponding URLs in the "Social Network URLs" section.
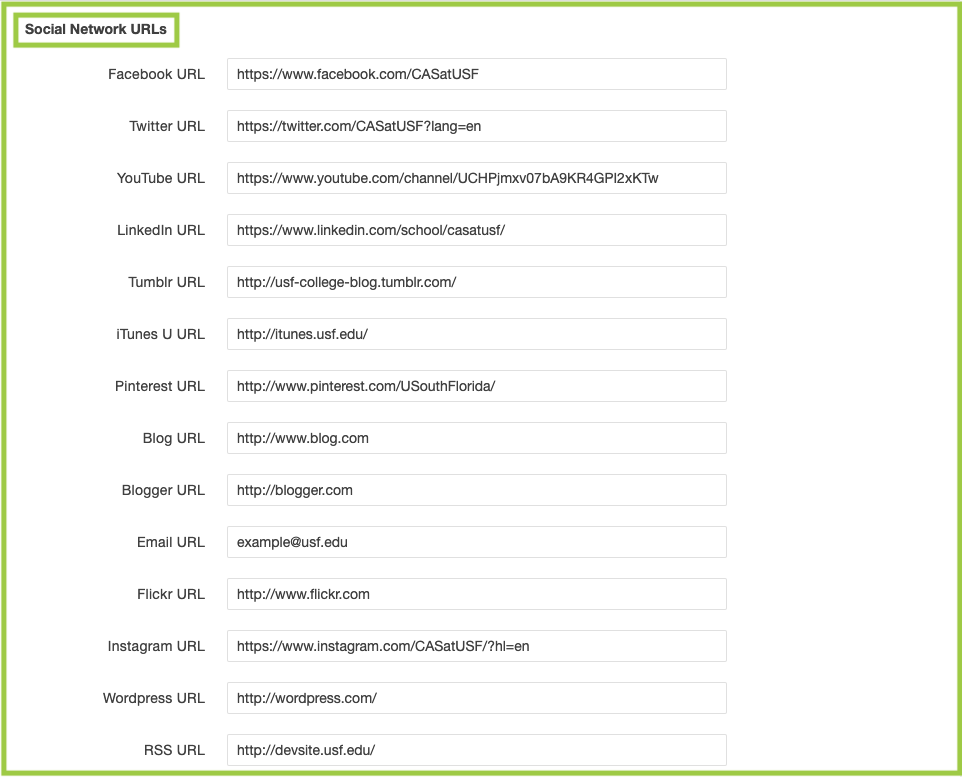
- Click Save.
*Please note: for sites created after August 15, 2016, the Social Media section can be found in the website directory's Properties File (_props.pcf).