Publishing
Overview
Recorded Workshop
Learn more about the different CMS servers and what content should be created and published where in the "Staging, Test, and Production" and "Servers and Text Page Basics" workshops.
Once a page has been edited, it can either be sent to another user for approval, it can be published to the testing server (Test), or it can be published and made live directly to the production server (Production). Note: prior to your site going live for the first time, you should publish all pages and changes to Test. Then publish the index page to Test once more to generate a test link for the test site for review.
The ability to publish pages to Production is based on permissions. To access the publish options from the folder structure, click on the Publish dropdown menu under the Options column.
Publish Individual Pages
A Publish button will appear at the top of the page.

Click on this button, which will bring up a publish screen. After completing the elements described below, click the Publish button that appears at the bottom of the publish screen.
Final Check
This allows a final spelling, link, and accessibility check to be completed before publishing the page. Find out more about how to run checks before publishing.
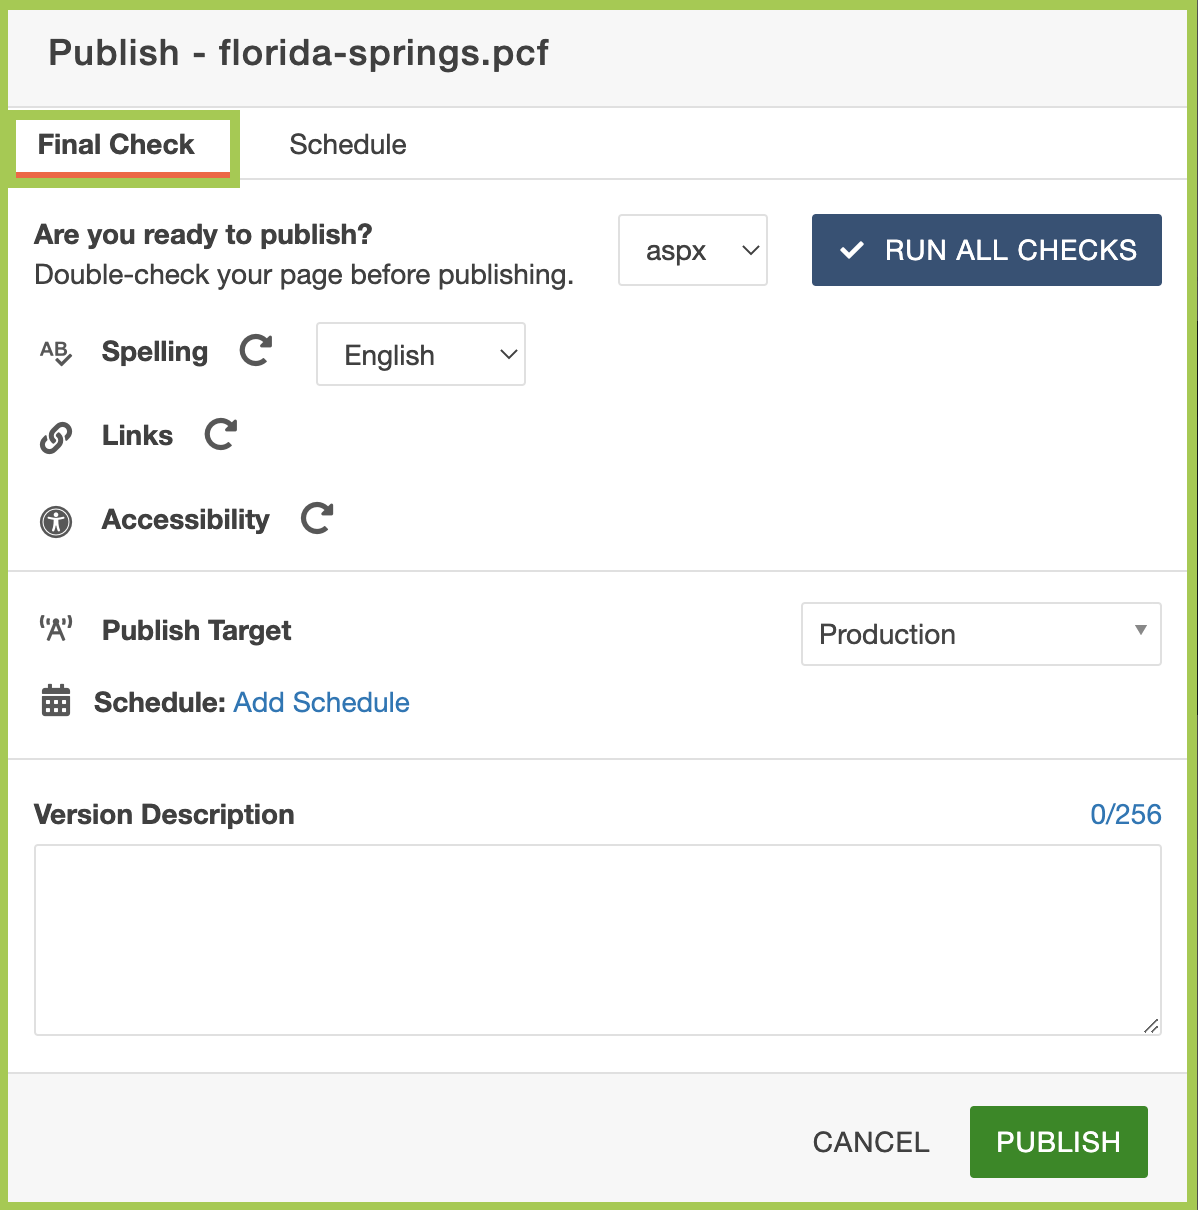
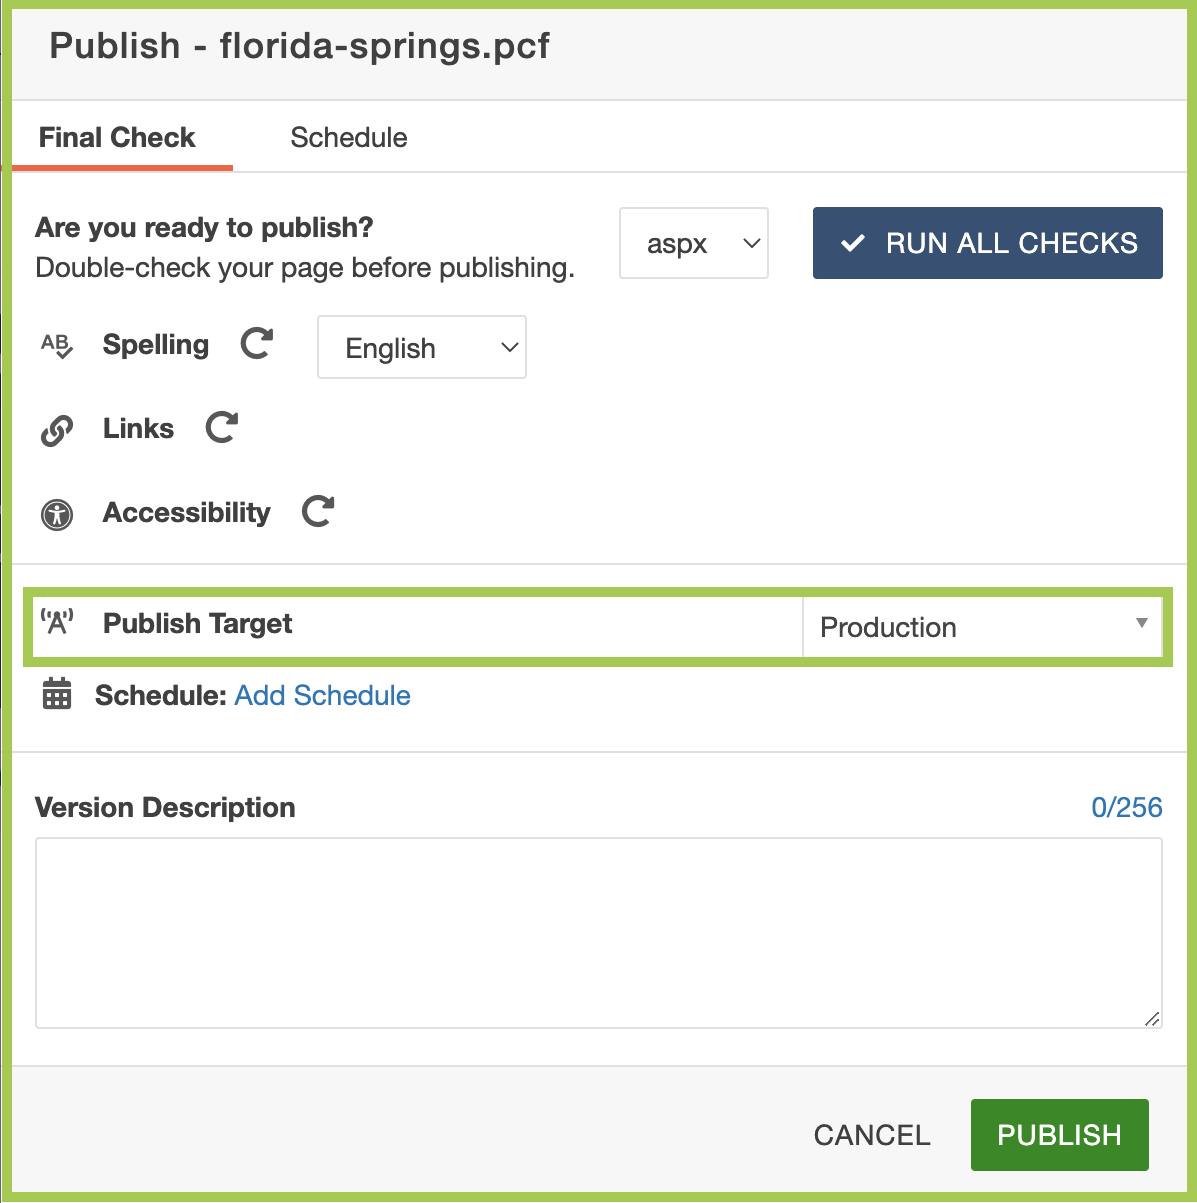
Publish Target
This provides the option to publish to the production (live) site and/or the testing server that will generate a test site for review. This menu only appears after your site has been launched.
Schedule
When users want to publish content, but wish to do so at a later date, they can utilize the Schedule tool. A scheduled publish can only be canceled or modified by the user who set the schedule or an administrator.

Clicking "Add Schedule" from the Publish helper window will bring up a screen in which the scheduling can be completed.
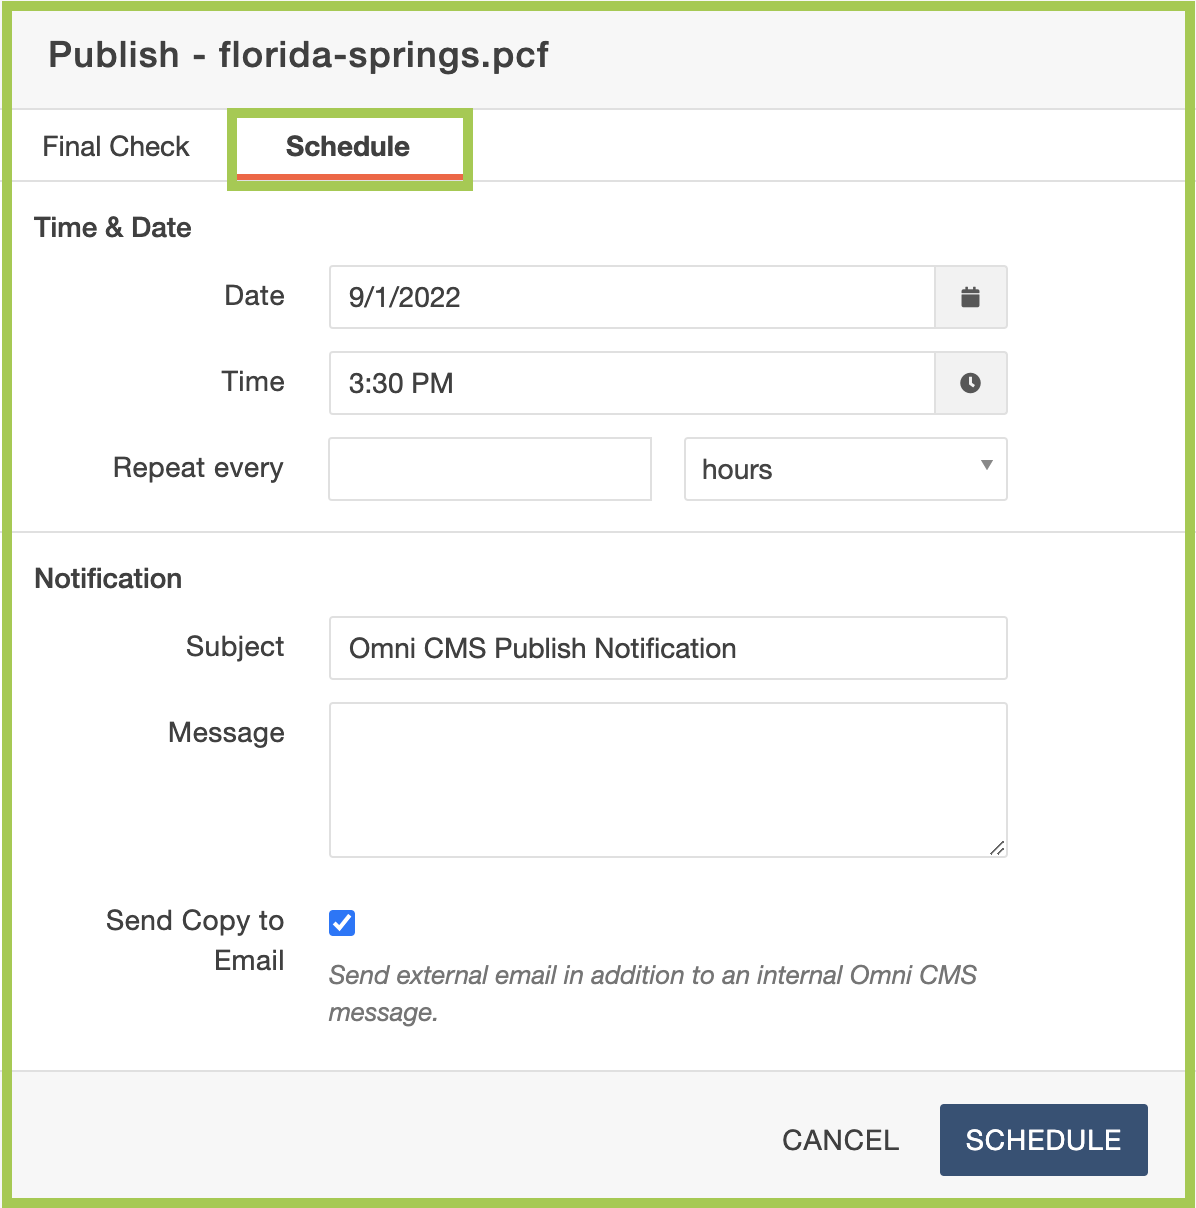
- Select the date and time, and indicate whether or not the publish should repeat.
- Create an optional email message to be sent upon completion of the publish to the
Dashboard by including a "Subject" and "Message".
- Keeping the checkbox next to “Send Copy to Email” checked will send the completed publish message to your @usf.edu email address as well as within the USF CMS. If this is unchecked, the message will be sent through the USF CMS only.
- Click "Schedule".
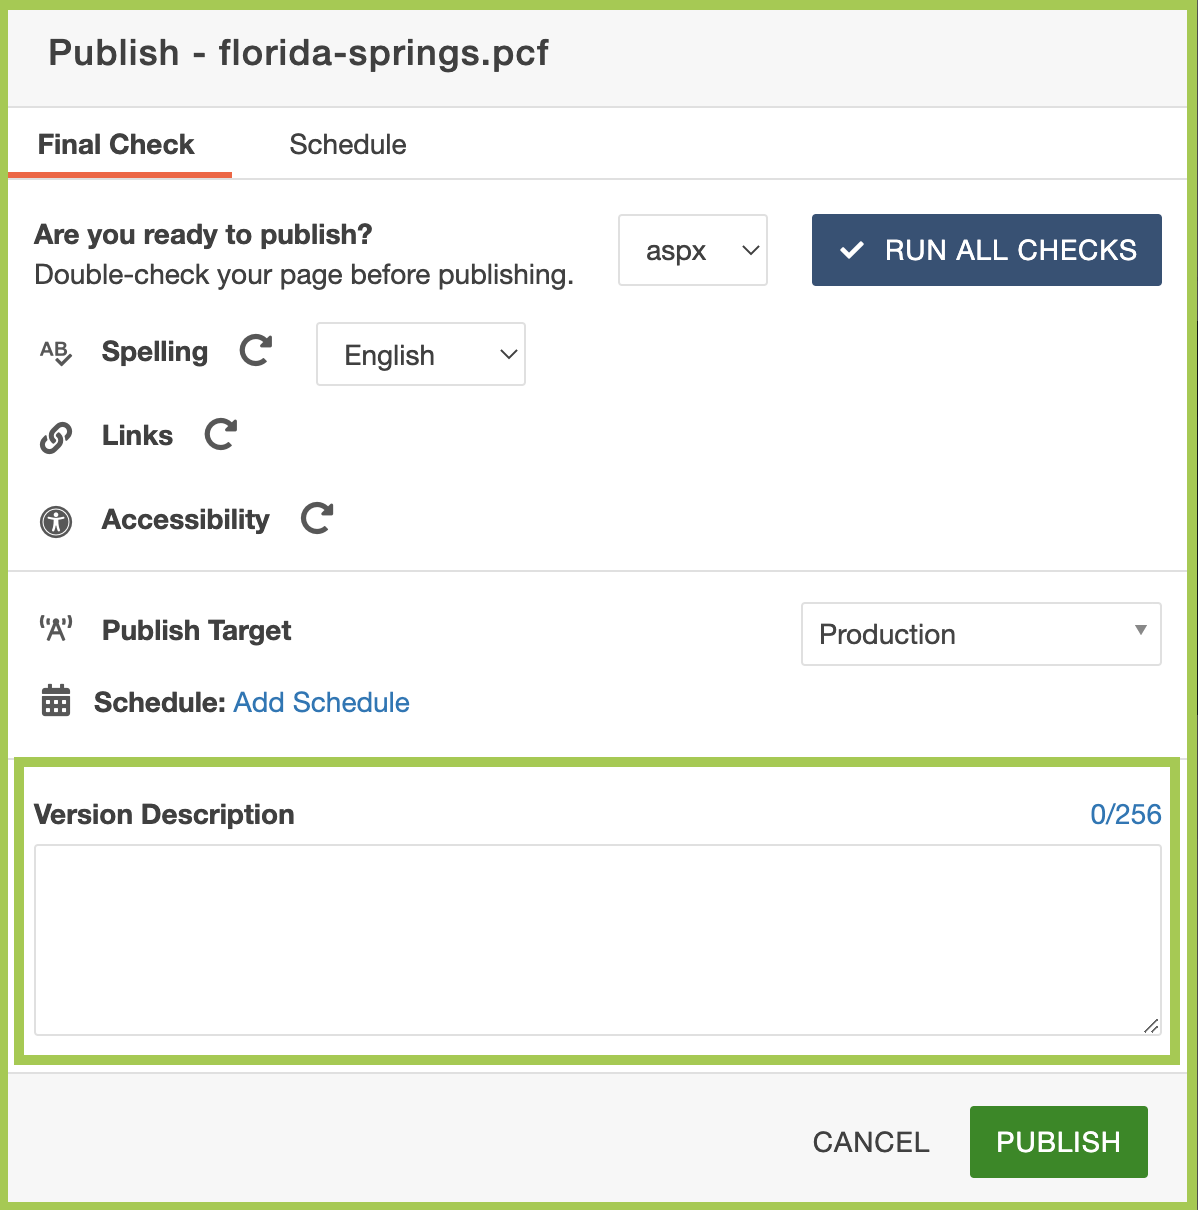
Version Description
This will allow a version description to be included in order to indicate what was updated and why the page is being published for internal purposes. This can also be used after a page has been reverted to a previous version.
Publish Button
Once the publish is complete, the system will present a success message, which includes a link to view either the test page or published (live) page.

Publishing Multiple Pages Simultaneously
It is also possible to publish multiple pages within a directory simultaneously. Keep in mind that doing this does not allow for:
- Final Check
- Version Description(s)
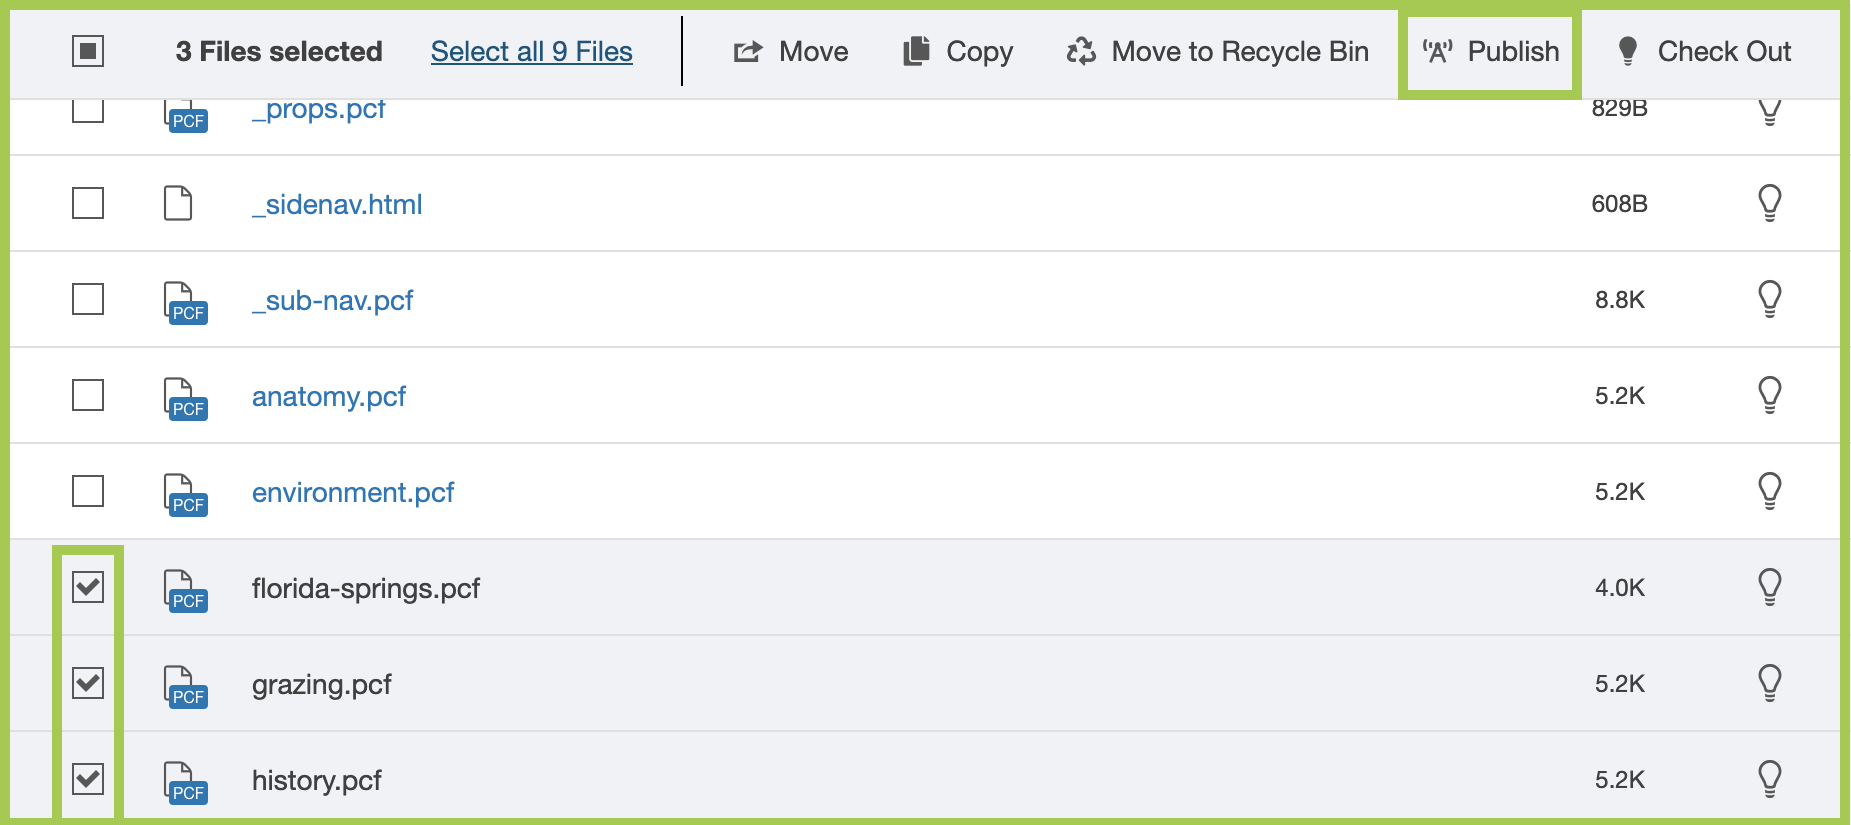
From within the folder structure, check the boxes next to the page(s) to be published and click the “Publish” button at the top of the screen. Keep in mind that the system will only allow pages to be published that do not require approval and are not checked out to another user. If a warning is displayed, uncheck the page(s) indicated in the warning, and click “Publish” again.