Default & Enhanced Homepage
Default Homepage: Index - MultiEdit
Recorded Workshop
Learn more about the unique functionalities of the Default Homepage (index file) in the “Props vs. Index” workshop.
Overview
The MultiEdit area is where you will complete the majority of your homepage content edits.
MultiEdit can be accessed once a file is checked out (lighbulb icon is illuminated) by clicking:
- "Edit", then "MultiEdit".
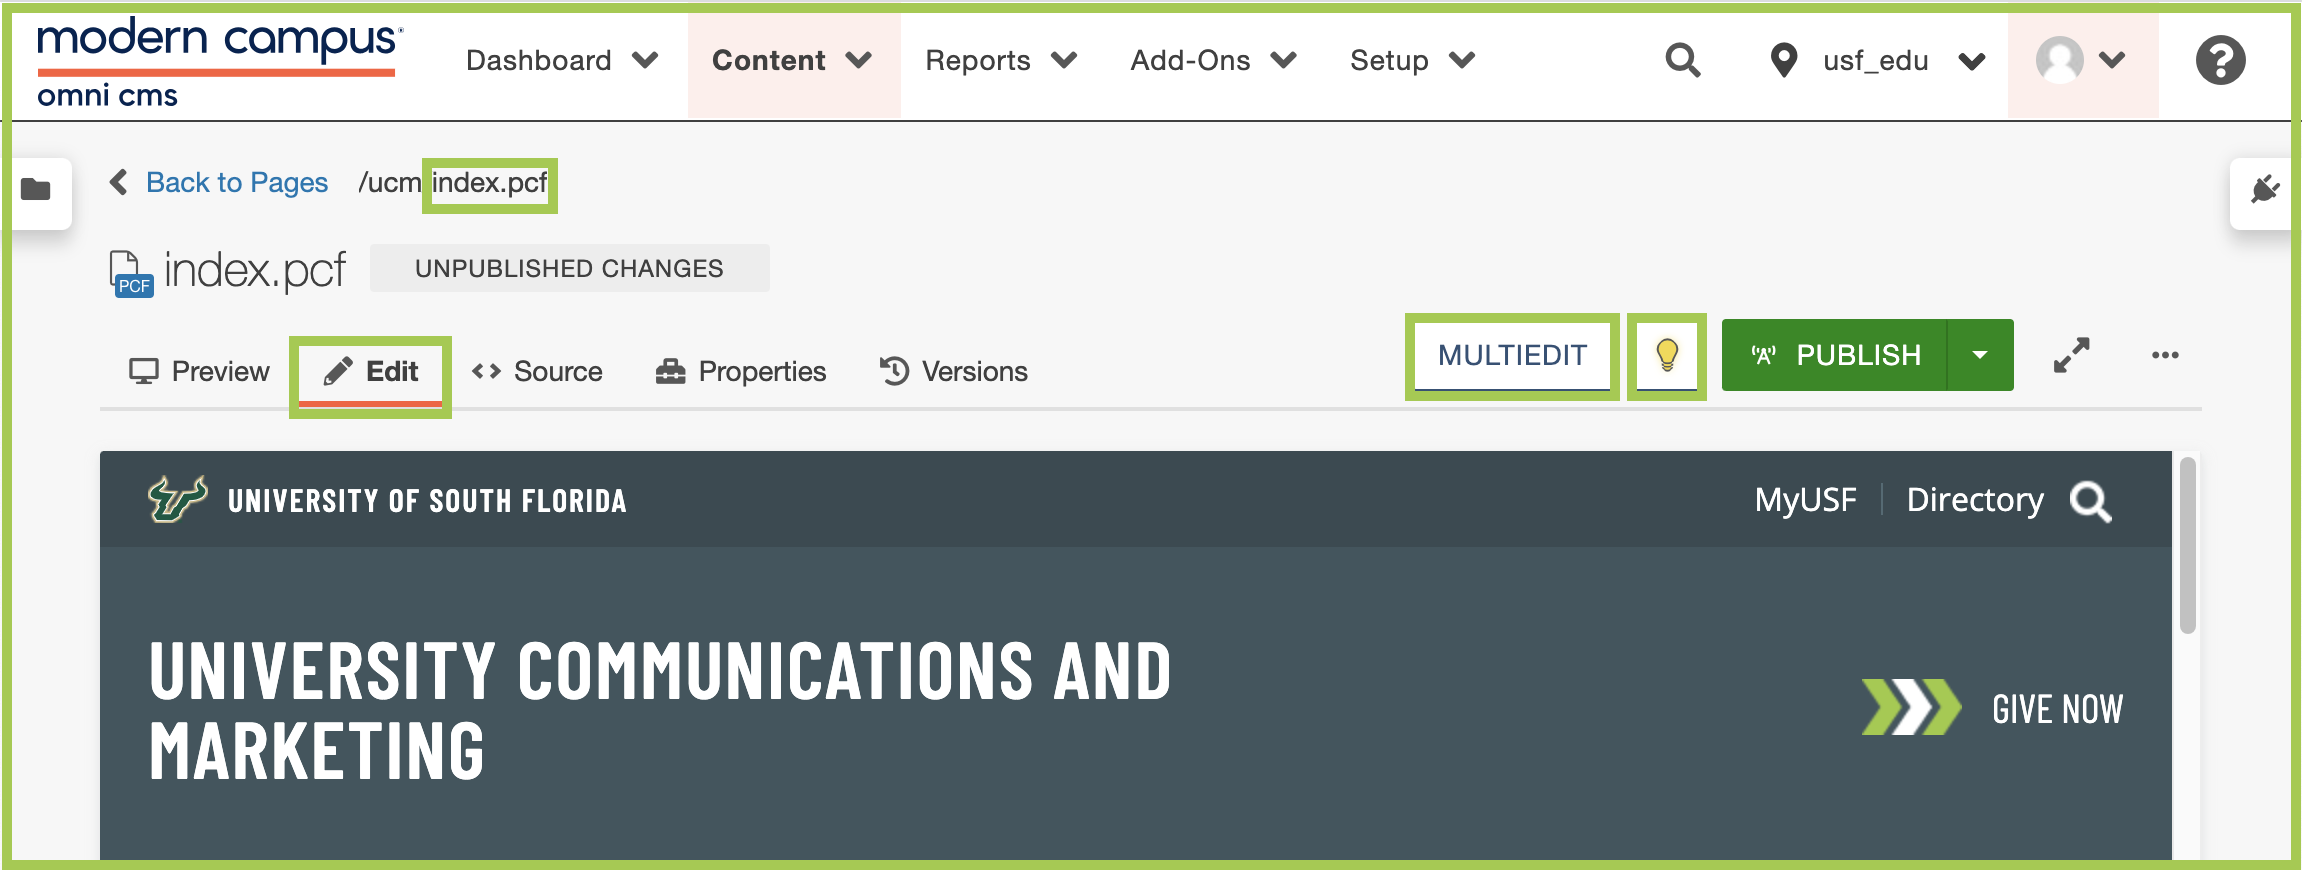
- "Properties", then "MultiEdit" on the left side navigation.
Once in the MultiEdit section, you will be able to add your images, videos, Feature Rotator content, and Highlighted Content Section information to bring your homepage to life.
Tip: Prior to entering content in the MultiEdit section, be sure to have your images sized and ready for upload.
Based on your Feature Area and Highlighted Content Section selections in Index - Parameters, you will then update the content for that section:
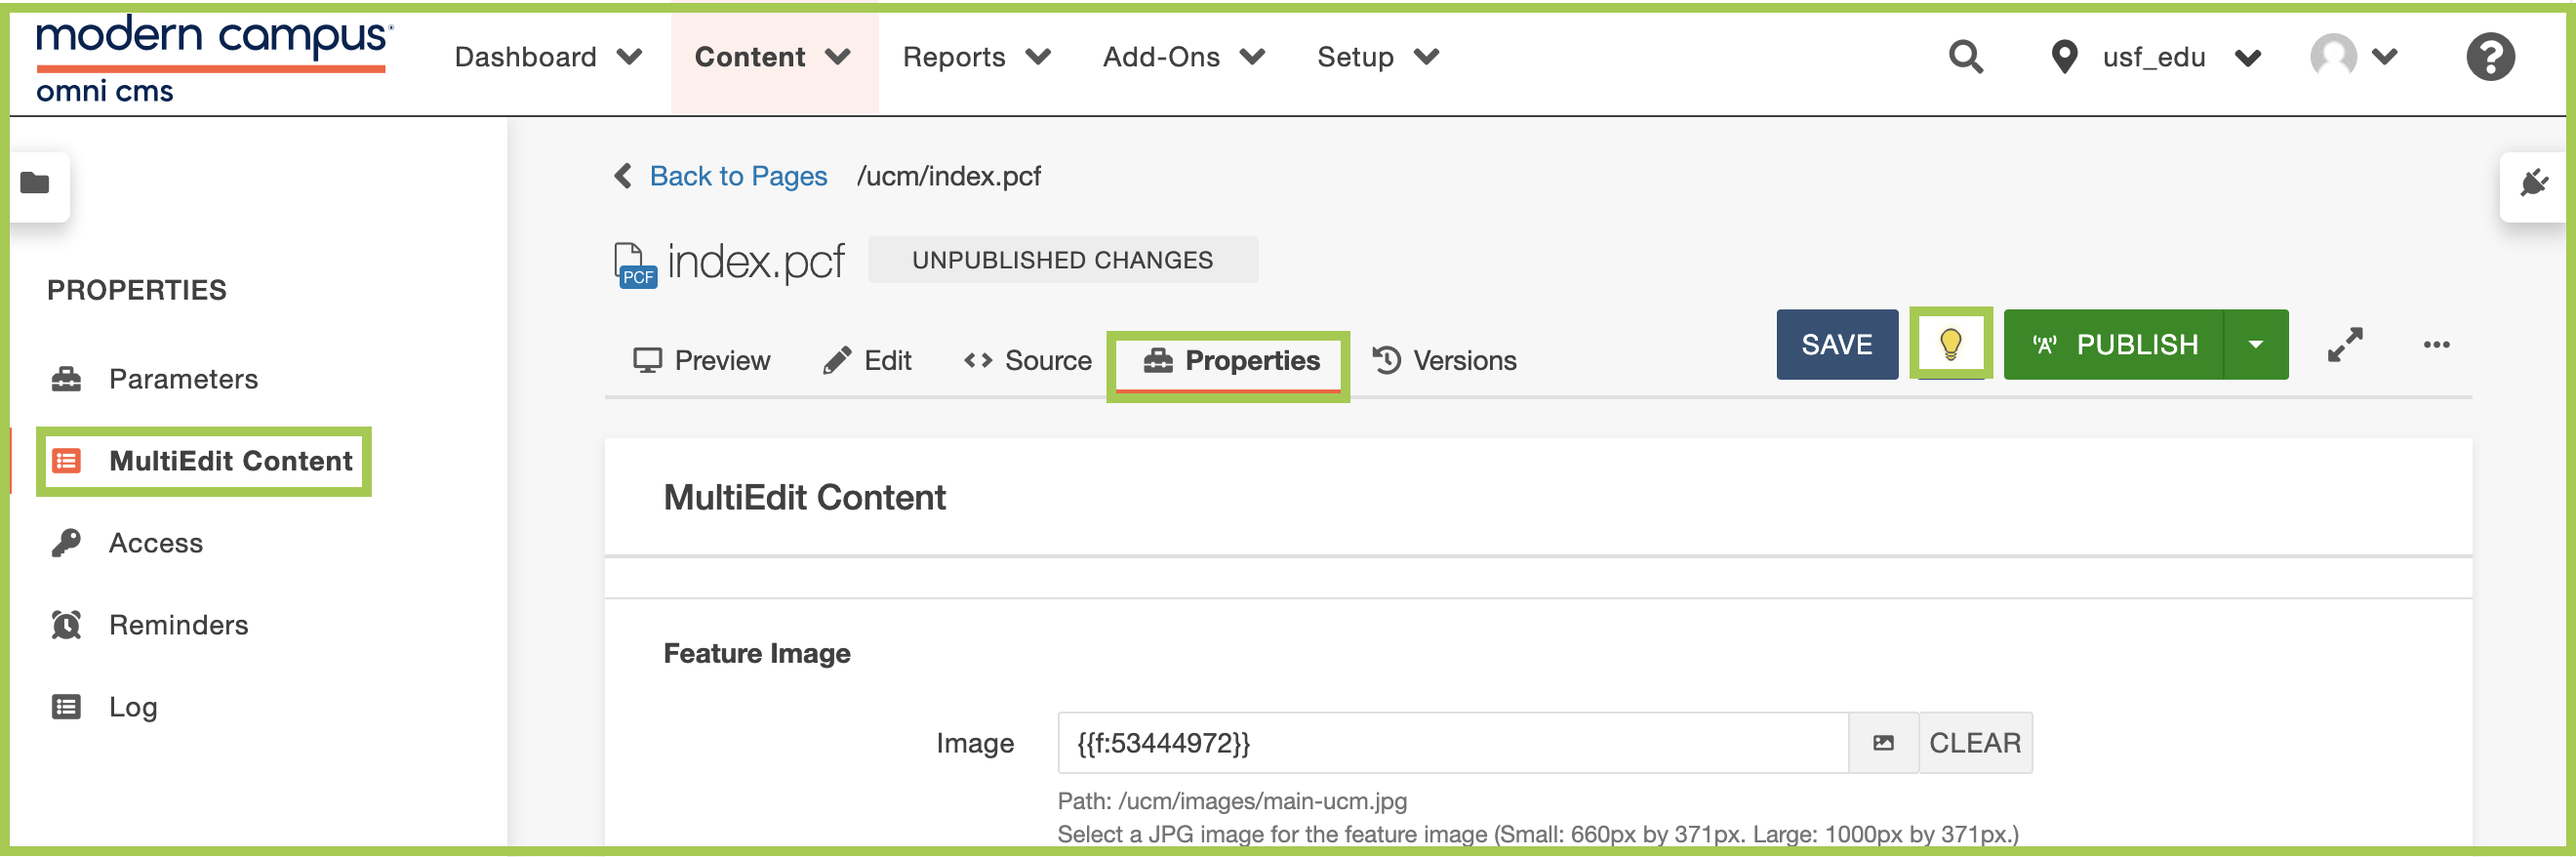
Feature Image - Small/Large
Feature image - small/large
- Click the document icon (Dependency Manager) to navigate to the correct image.
- Add an image description and URL for Feature Image - Small/Large.
- Select Yes or No for "Caption Display".
- If Yes, add the content you would like displayed in the "Caption Title" and "Caption Text" fields. (Both fields are optional.)
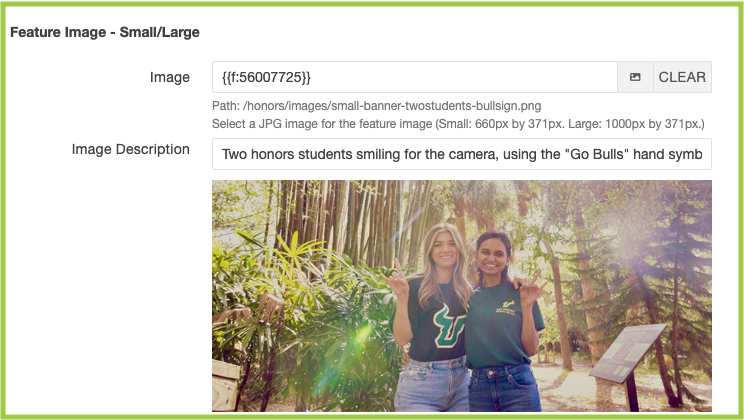
Feature Image - Full-Width
Feature image - full-width
In order to have a full-width image in the feature area, a small image (650 px by 302 px) will also need to be uploaded to ensure the page has an available image for mobile view.
- Click the document icon (Dependency Manager) to navigate to the correct image.
- Add an image description.
- Repeat the same directions for the "Image - Large" and "Image Description" fields.
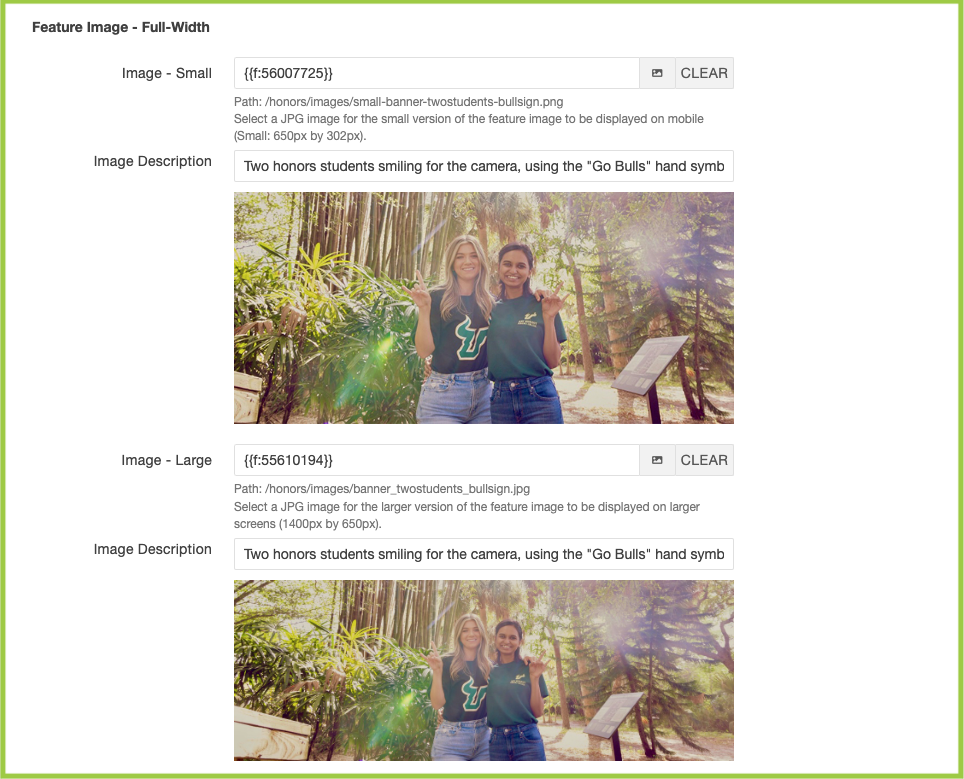
- Click the dropdown to select yes or no on whether you would like to have a heading and text display over your full-width image.
- If Yes is selected, fill in the "Heading" and "Text" fields with the content you would like displayed over the photo.
- Select if the feature image should be linked by selecting Yes or No from the dropdown.
- If Yes is selected, include the URL in the "Link URL" field.
- If it is an internal link, you can select the Choose File button to navigate to internal pages.
- In the last full-width image field, select Yes or No to open the link in a new tab.
Feature Rotator
Feature rotator
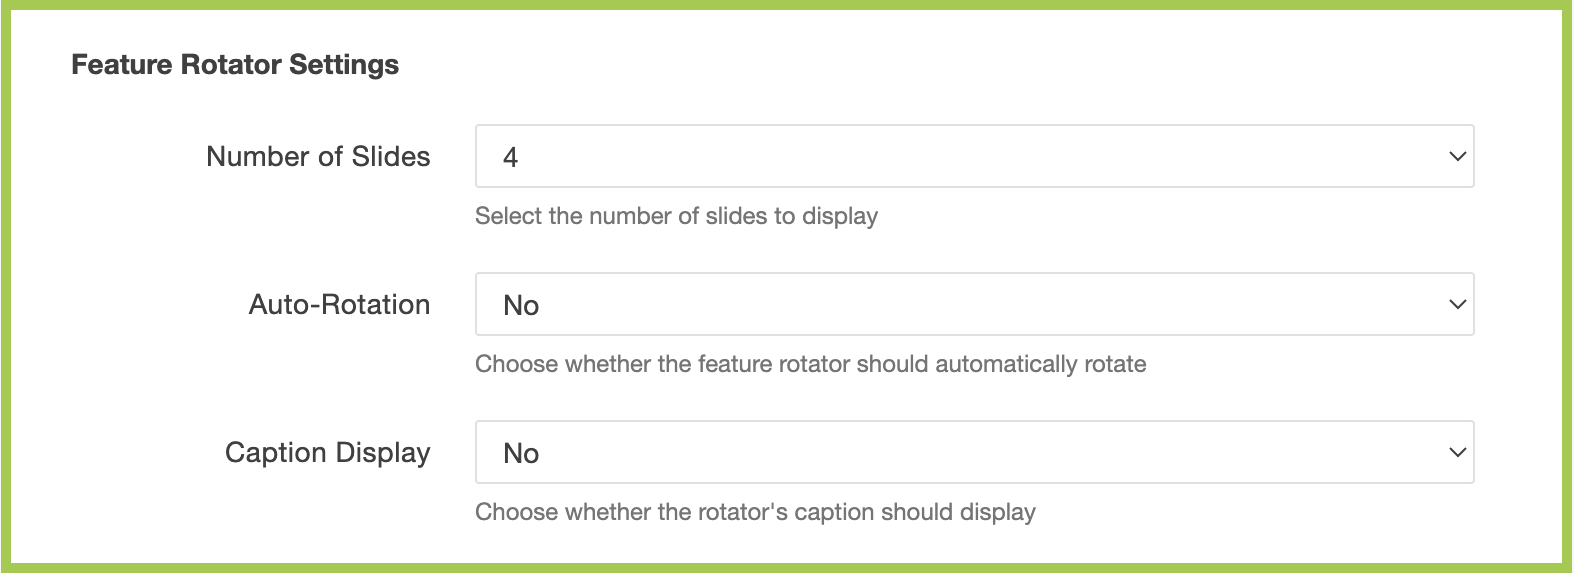
- In the "Number of Slides" field, select the number of slides to display on the Feature
Rotator.
- The Feature Rotator allows 2-5 slides.
- Select Yes or No from the "Auto-Rotation" dropdown.
- If Yes is selected, the Feature Rotator will automatically rotate between slides.
- Select Yes or No from the "Caption Display" dropdown.
- Each slide allows for its own caption.
The next five sections allow you to enter the information for each slide and in the order it will appear in the Feature Rotator.
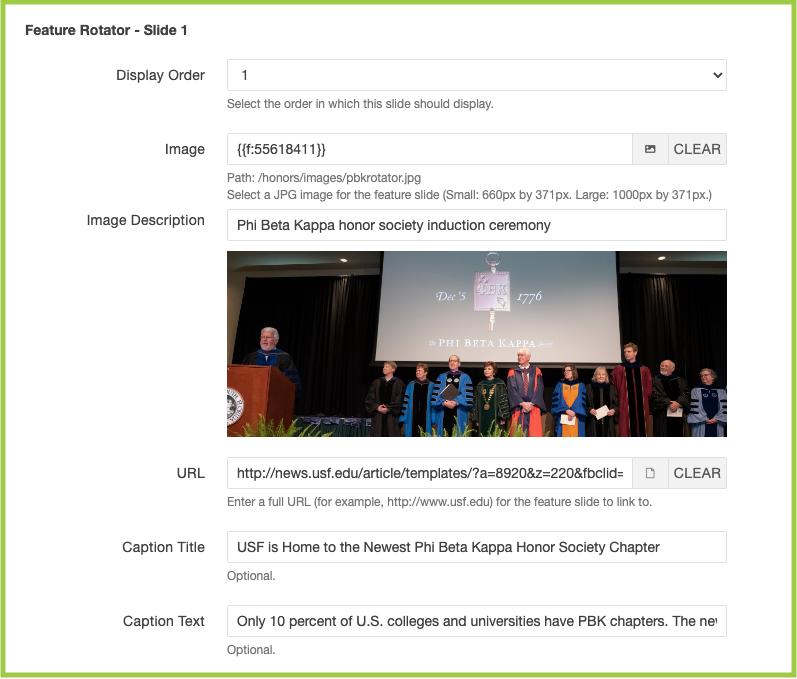
- Each slide requires the following fields:
- In the "Display Order" field, choose the number of images you would like displayed in the Feature Rotator (1-5).
- In the "Image" field, use the Dependency Manager to navigate to the photo you would like to use.
- Choose a Small or Large image based on your Feature Area selection in Index - Parameters.
- Click Insert.
- In the "Image Description" field, add text that describes the image.
- In the "URL" field, use the Dependency Manager to navigate to the link you would like to use or paste an external link.
- If Yes was selected for "Caption Display", add content for both the "Caption Title" and "Caption Text" fields.
- Repeat steps 1-6 for the remaining Feature Rotator slides (if applicable).

- Once all information has been updated, the Feature Rotator will display on the homepage
with:
- A left (previous) arrow, a right (next) arrow, a play/pause button, icons indicating which slide is being displayed, and caption(s) (if applicable).
- If Yes was selected for "Auto-Rotation", the Feature Rotator will automatically rotate
between slides.
- The time between each rotation is set and cannot be changed.
- Users can let the Feature Rotator auto-rotate, or they can click the left or right arrow to view the other slides. They can also click the play/pause button to pause the auto-rotation.
Note: In order to comply with accessibility guidelines, automatically playing content such as videos and rotators are required to have a play/pause button. The play/pause button will automatically appear on the rotator and cannot be removed.
Highlighted Content
highlighted content Section
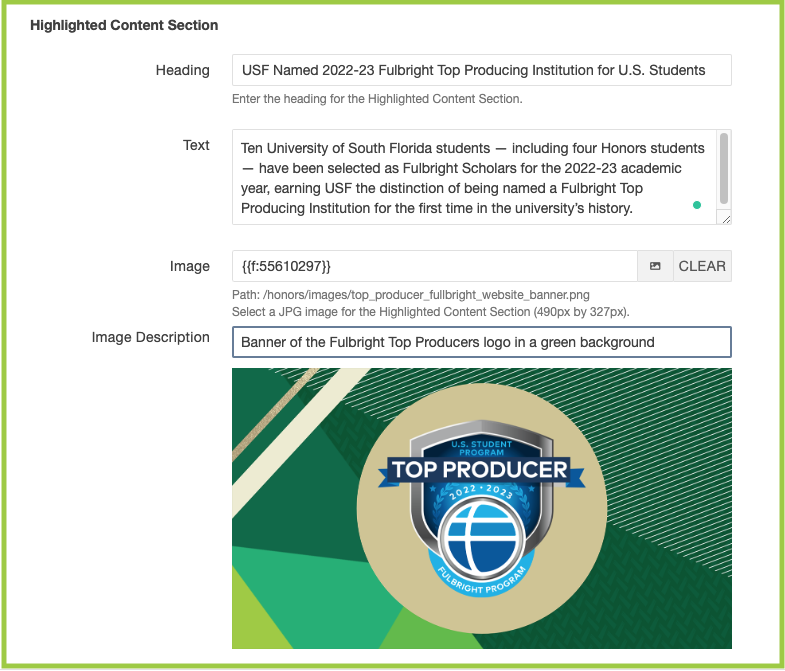
- Add the "Heading" for the Highlighted Content section.
- Add the "Text" you would like displayed in the Highlighted Content section.
- Click on the Select Image button within the "Image" field or manually insert the path
to your image.
- If you choose "Select Image", navigate to your designated image folder and select the image you would like displayed or alternatively you can navigate to your folder and upload an image by clicking the Upload button at the top right. The image size should be 490 px by 327 px.
- Add an image description.
In the Highlighted Content Section Link:
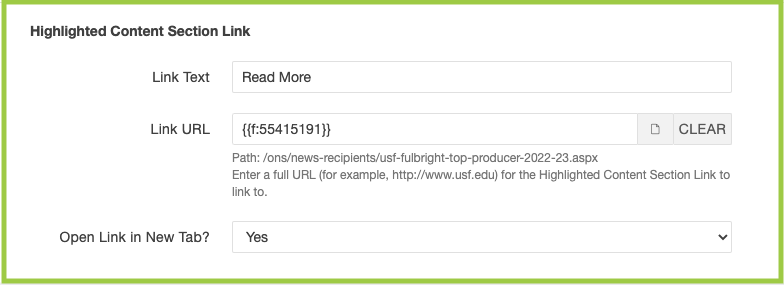
-
- Add the "Link Text" to be displayed underneath the content.
- Add the "Link URL" that will be utilized for the heading and link text underneath the content.
- Choose Yes or No from the dropdown to determine if the link should open in a new tab.
Saving and Publishing
Once all your modifications to the page are complete:
- Click the Save button at the top right side of the page.
- From the Publish drop down menu, select which action is appropriate for your permission level/workflow (Publish, Schedule, Submit for Approval, etc.). For additional publishing details, visit Before you Publish.