Default & Enhanced Homepage
Properties File (_props.pcf)
Recorded Workshop
Learn more about the unique functionalities of the _props file in the “Props vs. Index” workshop.
Overview
Within your website directory, you will find a "_props.pcf" file that will allow you to change elements of your homepage. (You will also find a "_props.pcf" file within each website section, but these will rarely be updated, and only include Title and Metadata and Custom Settings.)
- Access and Update _Props.pcf File
- Title and Metadata
- Custom Settings
- Donate Link
- Main Navigation
- Footer
- Custom Footer (optional)
- Social Media*
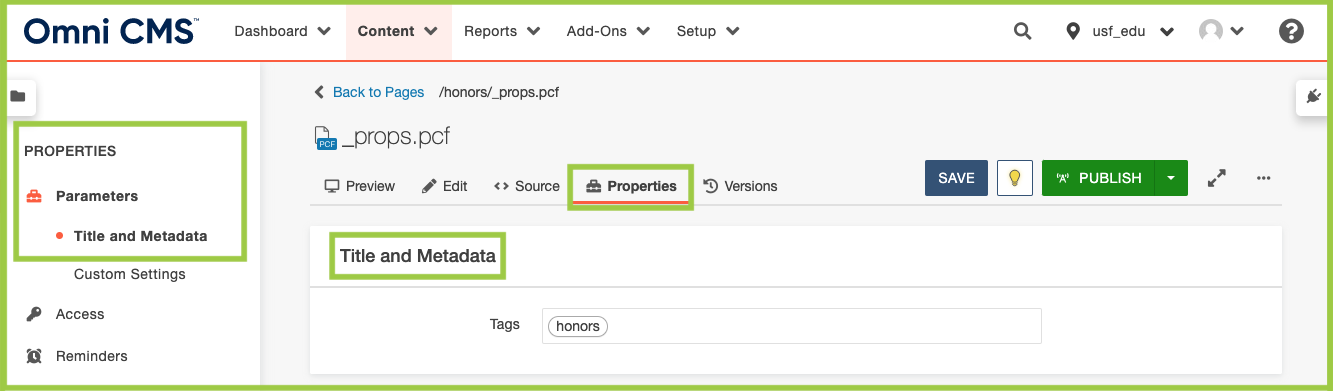
access and Update _props.pcf file
- Navigate to your homepage directory and select the "_props.pcf" file.
- Click on the light bulb to check out the file.
- Click on the "Properties" button in the page options at the top of the page.
- Be sure you are in the Parameters area on the left navigation.
- Update the fields with your site's information.
Note: This information is set up when your website is created and will not be updated frequently.
Title and Metadata
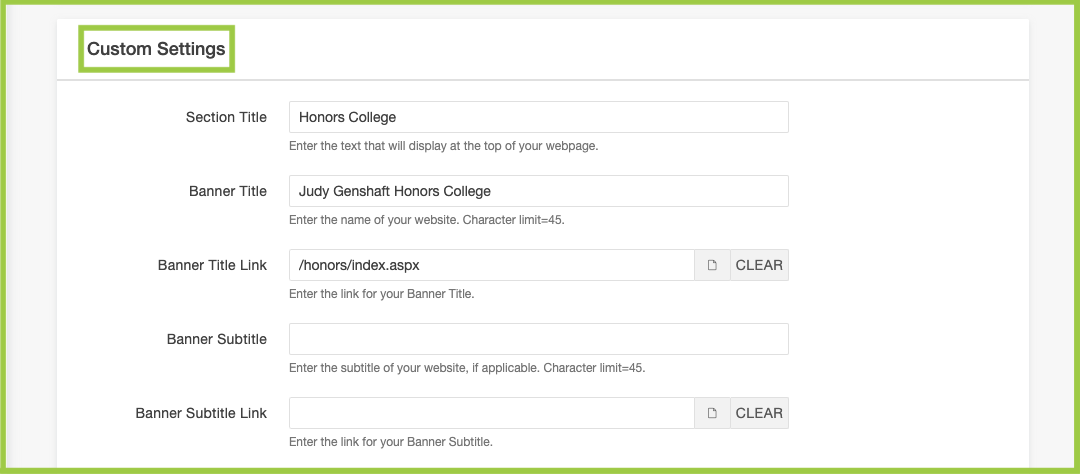
Custom Settings
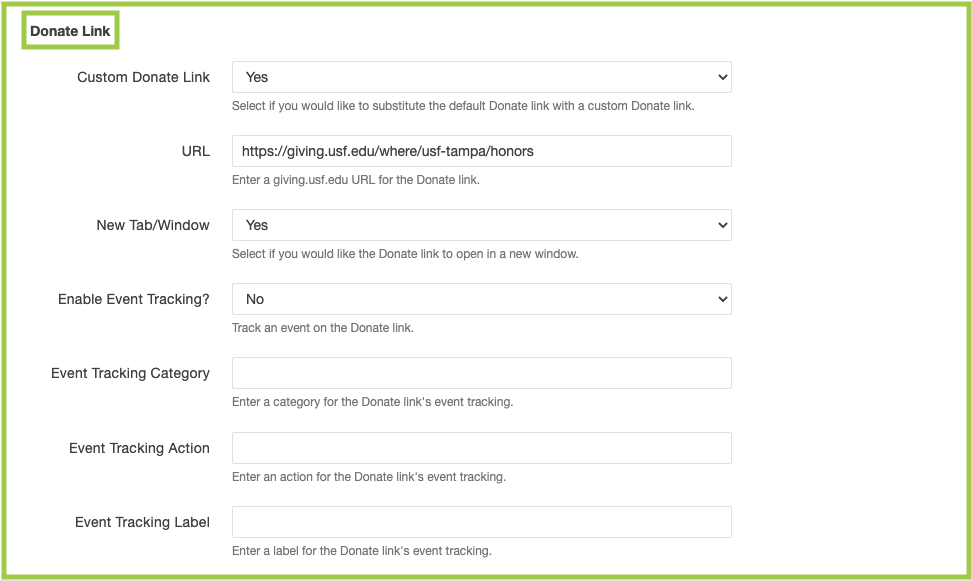
Donate Link
Main Navigation
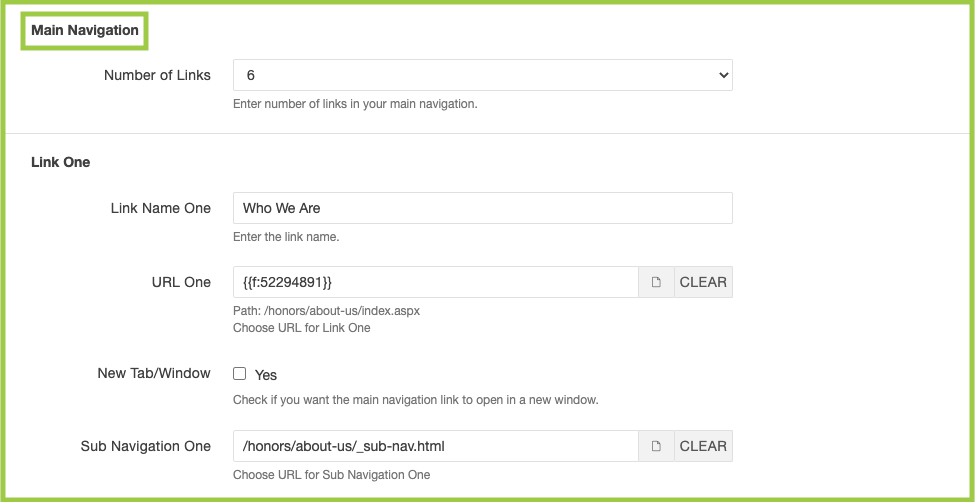
- For Main Navigation links, click on the document icon, navigate to and click on the page you wish to link to. You may also enter in the URL manually (use relative URLs for pages within the USF CMS.
- For drop down menus, click on the document icon for "Sub Navigation", navigate to and click on the "_sub.nav.html" file you wish to include. Sub navigation files need to be created and published prior to selecting them here. Learn more about sub navigation files.
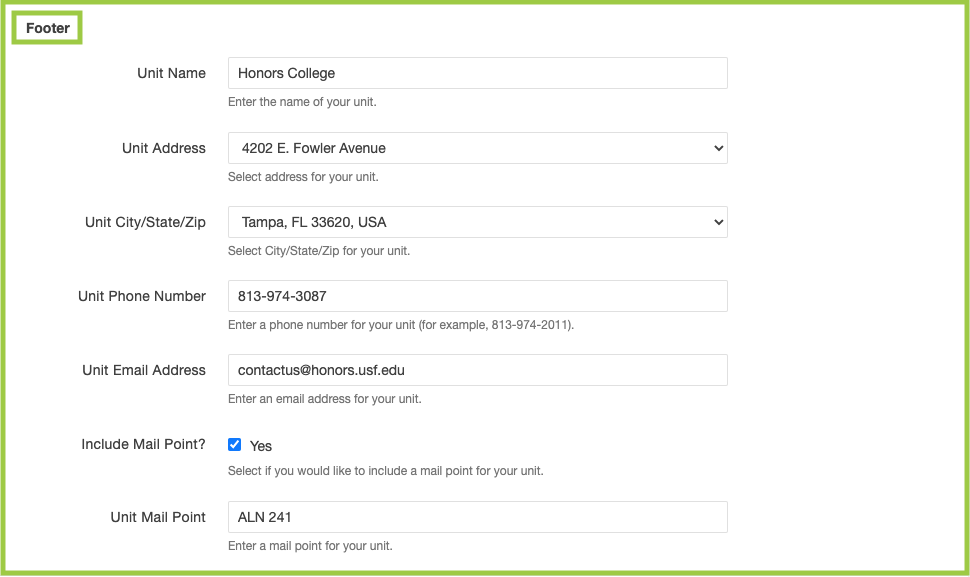
Footer
Custom Footer Links (optional)
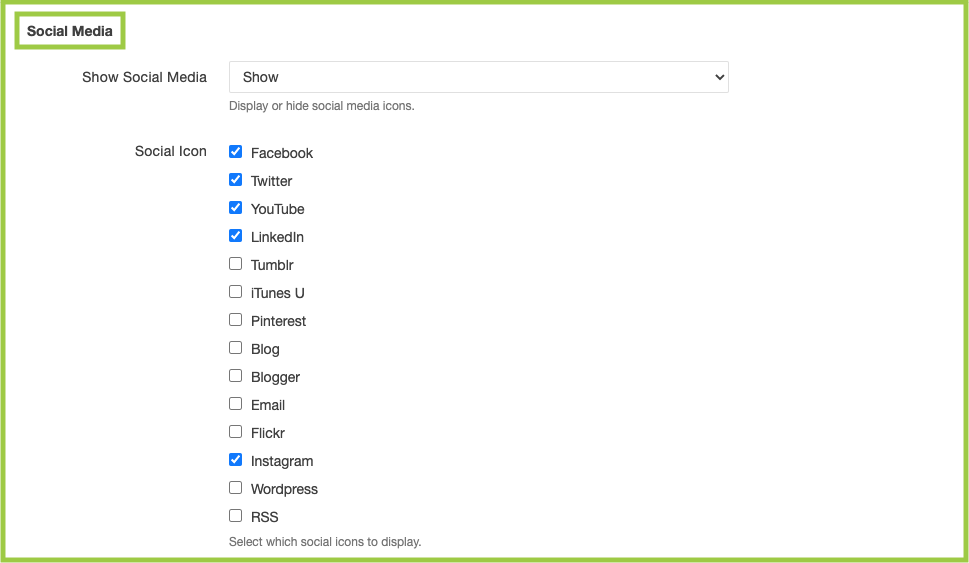
Social Media*
- Navigate to your homepage directory and select the "_props.pcf" file.
- Click "Properties".
- Under "Social Media", select "Show" or "Hide" in the "Show Social Media" section.
- Select/deselect the social networks you wish to show on your homepage.
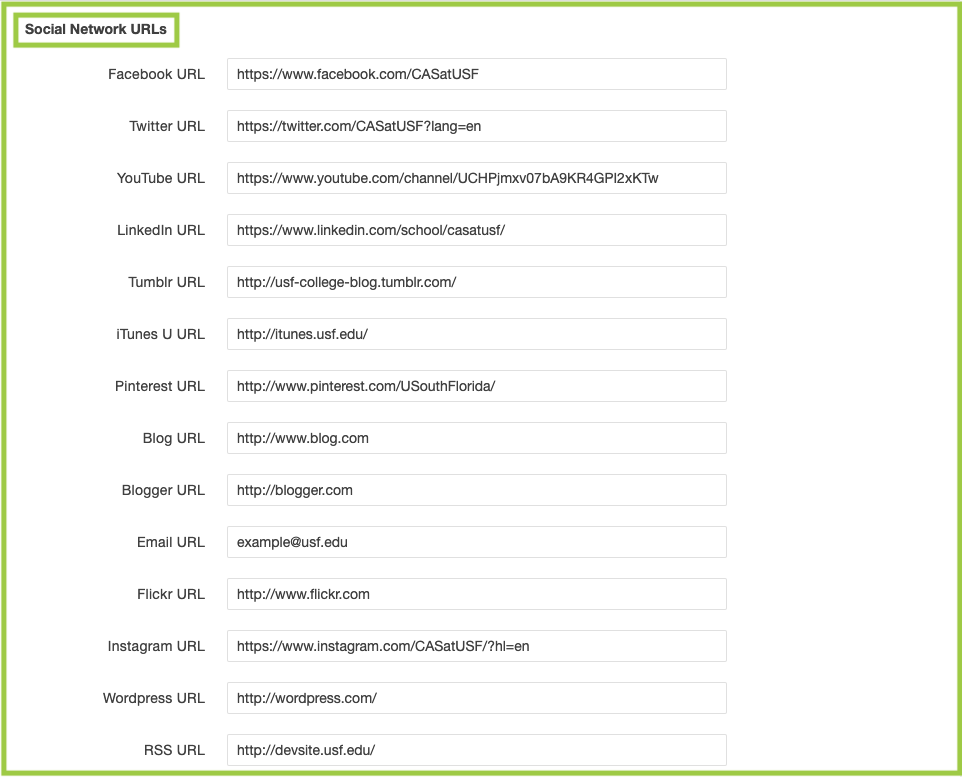
- Enter in the corresponding URLs in the "Social Network URLs" section.
- Click Save.
*Please note: for sites created before August 15, 2016, the Social Media section can be found in the website directory's Index - Parameters.
- Once all edits are complete, click Save.
- From the Publish dropdown menu, select which action is appropriate for your permission level/workflow (Publish, Schedule, Submit for Approval, etc.).
For additional publishing information, see our resources.