General Website Info
WYSIWYG Editor
Recorded Workshop
Overview
The WYSIWYG (What You See Is What You Get) Editor contains all the tools necessary to edit Text and Gallery pages (with limited toolbars included in some widgets). The available tools found in the toolbar will depend on the site and page configuration. Some tools may not be available based on permission levels. The WYSIWYG Editor includes basic editing functions, such as those found in Microsoft Word® (cut, copy, undo, redo, bulleted list, numbered list, indent, etc.). This document will review some other common functions.
WYSIWYG Editor Options

Save
![]()
The Save icon allows the user to save the changes that have been made to the page. Using the Save icon will also close the WYSIWYG Editor and take the user to a preview of the page. If the user desires to save-in-place while continuing to edit, use the keyboard shortcut (CTRL+S for Windows and CMD+S for Mac).
EXIT WITHOUT SAVING
![]()
The Exit Without Saving icon allows users to exit the WYSIWYG Editor without saving
changes.
RESTORE LAST DRAFT
![]()
The Restore Last Draft icon will undo all changes and revert the content in the editable region to its original
state.
CUT, COPY, PASTE
![]()
Cut
The Cut icon removes selected content from its original location, to be inserted where pasted.
Copy
The Copy icon copies selected content from its original location, to be inserted where pasted.
Paste
The Paste icon inserts previously selected content. It also removes styling that is not compliant with the WYSIWYG Editor, such as Microsoft Word formatting.
FIND AND REPLACE
![]()
The Find and Replace icon searches for text in the editable region, which can then
be replaced with other text.
UNDO, REDO

Undo
The Undo icon erases the most recent changes made in this session, one by one.
Redo
The Redo icon reverses the undo.
SPELLCHECK
![]()
The Spellcheck icon checks the spelling within an editable region. The default dictionary is in English. However, if the page should be edited in another language (available languages are English, Spanish, French, Italian, and Portuguese), click on the downward facing arrow and select another language.
Misspelled words are identified with a wavy, red line. To fix the misspelled word, right-click the underlined word to change it to the suggested word or ignore it.
Keep in mind that the browser’s spell checker may be active and marking words as misspelled while the page is being edited. However, only USF CMS’s spell checker will reference the USF CMS custom dictionary. To help verify that a word is being marked as misspelled by the USF CMS dictionary, look to see if the spell check icon is highlighted. This indicates that the USF CMS spell checker being used.
BOLD, ITALIC
![]()
Bold
The Bold icon bolds selected text.
Italic
The Italicize icon italicizes selected text.
BULLET LIST, NUMBERED LIST

Bullet List
The Bullet List icon organizes the selected content into a bulleted list. For example:
- Marshall Student Center
- Juniper-Poplar Hall
- MLK Plaza
The Bullet List dropdown menu depicts the styles available for the list item marker.
Numbered List
The Numbered List icon organizes the selected content into a numbered list. For example:
- Check USF application status.
- Accept my USF scholarship.
- Apply for financial aid.
The Numbered List dropdown menu depicts the styles available for the list item marker.
DECREASE INDENT, INCREASE INDENT

Decrease Indent
The Decrease Indent icon moves a selected text block to the left.
Increase Indent
The Increase Indent icon moves a selected text block to the right.
SUPERSCRIPT, SUBSCRIPT
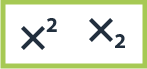
Superscript
The Superscript icon superscripts selected text.
Subscript
The Subscript icon subscripts selected text.
INSERT/EDIT LINK
![]()
Links are created by highlighting text to be made into a link and clicking on the
Insert/Edit Link icon. The icon will not appear until the text or image to be hyperlinked
is selected. Links can point to external websites, not maintained in the USF CMS,
or other pages within the USF CMS. The Insert/Edit Link icon can also be used to create
links to files, such as PDFs.
Insert a Link
- Highlight the content that will be made into a link.
- Click on the Insert/Edit Link icon.
- Enter the link.
- If linking to a page outside of the USF CMS, include the URL to the external page in the Link URL field.
- If linking to a page or file within the USF CMS:
- Click on the browse button.
- Find the file to which the link should be created. If the desired page is not in the selected directory, use the breadcrumbs at the top of the page and the folders within the window to navigate to the desired page.
- Click on the file you wish to link to.
- Click Insert.
As a general rule of thumb, when inserting a link to another page on USF’s main website or your site, the link should open in the same window. When inserting a link to a page housed within USF, or to a PDF, doc, or other similar file, the page should open in a new window. This selection is made in the field labeled “Open link in....”
- Linking to pages within USF’s website: Open in This Window/Frame
- Linking to pages on another site or binary files: Open in New Window (_blank)
Edit a Link
To edit a link that has been inserted on a page, click on the link, and then click on the Insert/ Edit Link icon. Follow the steps outlined above to modify the link. To delete a link, click on the link, and click the Remove Link icon.
REMOVE LINK
![]()
The Remove Link icon removes a link from the selected content.
INSERT/EDIT MAILTO LINK
![]()
The Insert/Edit Mailto Link icon creates a link from the selected content that prompts an email client to open a new email.
ANCHOR
![]()
The Anchor icon can be thought of as a bookmark on a page and allows users to jump to a specific
location on that page with just a click. For example, a FAQ page may use anchor links
to move users to an answer when a certain question is clicked. View UCM’s Logo Usage page to see anchor links in action.
Create an Anchor
- Position the cursor where the anchor should be placed or select the text or image.
- Click the Insert/Edit Anchor icon.
- In the Anchor Name field, enter the name for the anchor.
- Click Insert.
More than one anchor can be added to a page, but each should have a unique name. Names should be as short as possible and use lowercase letters. Numbers can be used, but they cannot start with a number. An anchor icon will then appear next to the text within the WYSIWYG.
Link to an Anchor
- After creating the anchor, select the text that will link to it.
- Click on the Insert/Edit Link icon.
- Select the appropriate anchor from the Anchors drop down menu and click Insert.
Modify an Anchor
- Click the existing anchor shown in the editing area.
- Click the Anchor icon on the toolbar.
- The Insert/Edit Anchor dialog shows the existing text for the anchor.
- Make the modification to the text and click Update
BLOCKS
![]()
Blocks
The Blocks icon sets the appearance of content on a line using HTML elements. A common use case is headings.
INSERT/EDIT IMAGE
![]()
The Insert/Edit Image icon inserts or edits an image.
INSERT/EDIT MEDIA
![]()
The Insert/Edit Media icon inserts or edits a video or other playable media. It allows users to embed a YouTube video on a text page. Currently, YouTube videos are the only accepted format.
Add a YouTube Video
- Place the cursor at the location on the page where the video should be displayed.
- Click on the Insert/Edit Media icon in the WYSIWYG toolbar.
- Paste the file’s URL into the Source box. Enter only this information. Do not remove, add, or change any other information on any other tabs. The CMS is configured to format the video automatically upon saving and publishing. Any modification could cause the design of the templates to break. You can use either the full YouTube URL from the address bar of your browser or the “Share” URL.
- Click Save.
HORIZONTAL LINE
![]()
The Horizontal Line icon inserts a horizontal line at the cursor:
INSERT LINE BREAK
![]()
The Insert Line Break icon inserts a line break at the cursor. It can be used to begin a new line of text without hitting the Enter or Return key.
This is typically used if you want lines of text to appear directly underneath each
other without the appearance of a space in between.
Hard Return
Digital Marketing Manager
University of South Florida
Line Break
Digital Marketing Manager
University of South Florida
SPECIAL CHARACTER
![]()
The Special Character icon inserts a special character, such as a copyright symbol
or Greek alphabet letter, at the cursor. The Special Character modal provides a selection
of 200 special characters from which to choose. Hover or use the left and right keyboard
arrows to navigate the selection. You can also use the Search function to find the
character you're looking for, you browse through the icon categories.
Click on the icon of the character to insert it into the page. To repeat the symbol on the page, highlight it, then hold down the Command key (Mac)/Control key (Windows) + C to copy it to the clipboard, then hold down the Command key (Mac)/Control key (Windows) + V to paste it on the page.
INSERT SNIPPET
![]()
The Insert Snippet icon allows users to add Snippets to a page.
INSERT ASSET
![]()
The Insert Asset icon allows users to add Assets to a page.
INSERT COMPONENT
![]()
The Insert Component icon allows users to add Components to a page.
MAXIMIZE CONTENT REGION
![]()
The Maximize Content Region allows users to expand the editable region to fill the
width of the frame window.